How to trigger mail sending:
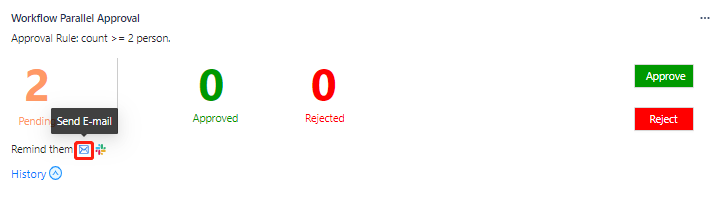
Click the email icon button to trigger. When the “Manually Send“ switch is on, there will be an email icon in the issue approval panel (as shown in the figure below). When clicking the email icon, the system will send email to all unapproved approvers, or you can send email to the designated approver.
Function we provide
Email templates can be customized
We provide the default email template. You can also modify the subject and body of the email template according to your actual needs.
A number of dynamic variables are provided for administrators to configure the template
On the left side of the page, we provide a number of dynamic variables that you can apply to your email template to dynamically send mail content for each approval.
Email templates support resetting
Click the “Reset” button below the template to reset the template to its original.
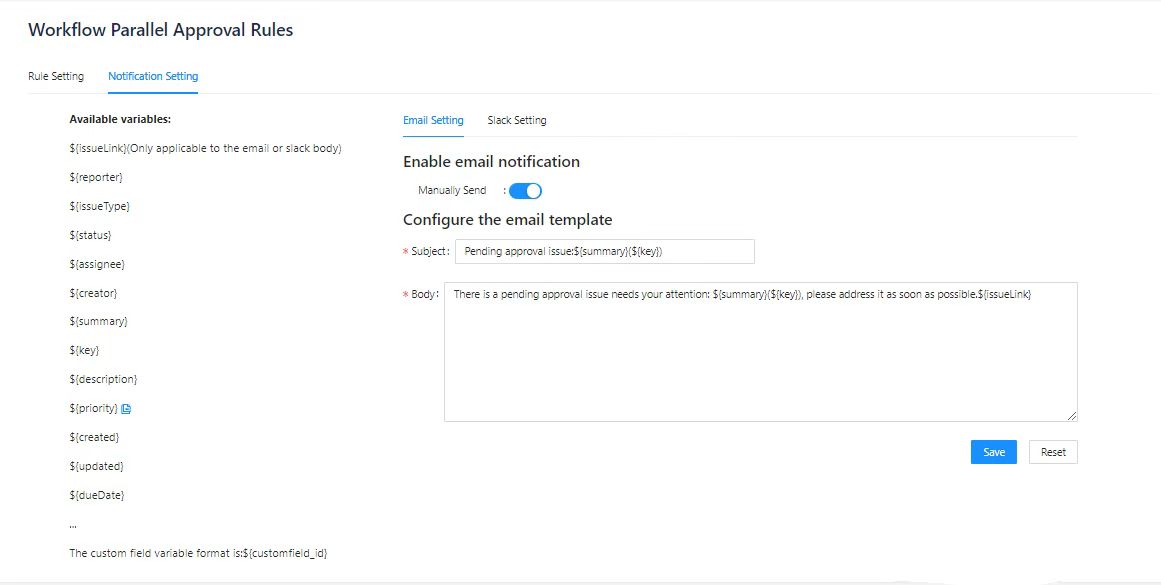
Note: If you need to use customfield variables in your Email template, the variables can be in ${customfield name} and ${customfield_*****}
Example of sending mail
...
| Tip |
|---|
For details on Email Setting, please refer to the next page. |
First:
When configuring mail, make sure "Outgoing Mail" is on. The administrator logs into the JIRA system, click the gear in the upper right corner, select "System" and enter the system page. Select "Outgoing Mail" in the title bar on the left side of the "System" page to enter the "outgoing mail" interface and enable "Outgoing Mail".
...
Next:
Select "Apps" under "application" in the navigation bar to enter the "Apps" interface, select "Workflow Parallel Approval rules" in the left title bar of "management application" to enter the "Workflow Parallel Approval rules" interface. Click the "Notification Setting" tab and select "Email Setting" to enter the "Email Setting" interface.
...
End:
Click the "Save" button, and the email template is configured successfully! (The default mail template is provided, which can be modified automatically if necessary.)
...